Pages

Showing posts with label trash to treasure. Show all posts

Tuesday, September 1, 2015

DIY: Old Drawers into Shelves

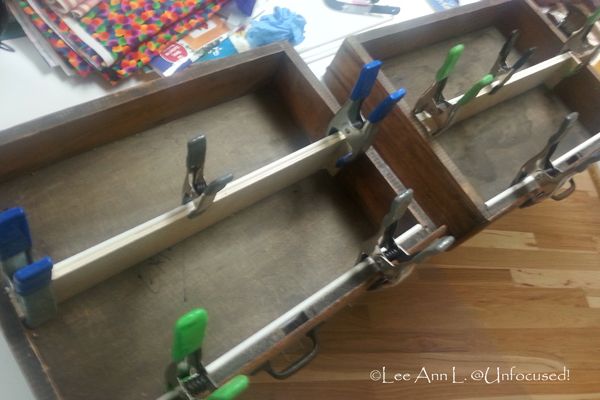
This is the only "before" picture of some old drawers that I purchased for $35.00 (for a total of four). This picture was taken way back in April with my phone.

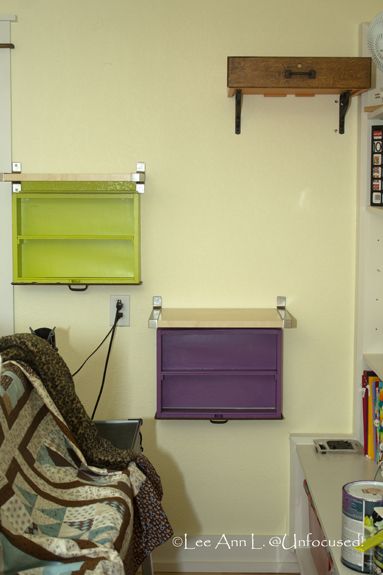
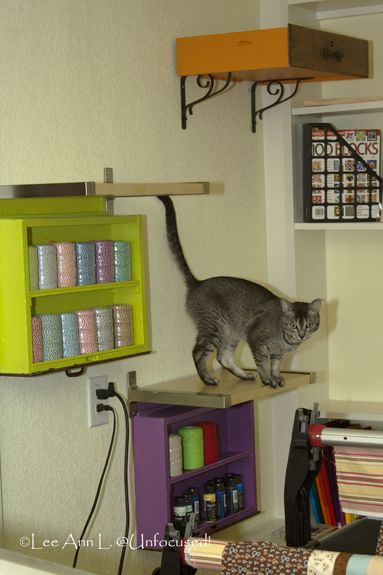
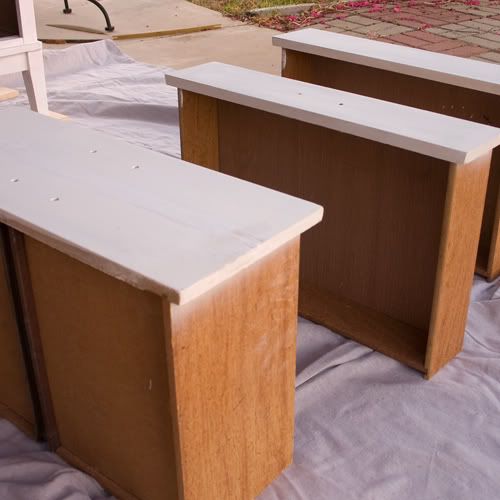
I put in some shelves in two drawers. I added a lip using dowel rods (to help prevent things from falling off shelves). I then painted each drawer leaving the front alone. l using leftover paint from previous projects.

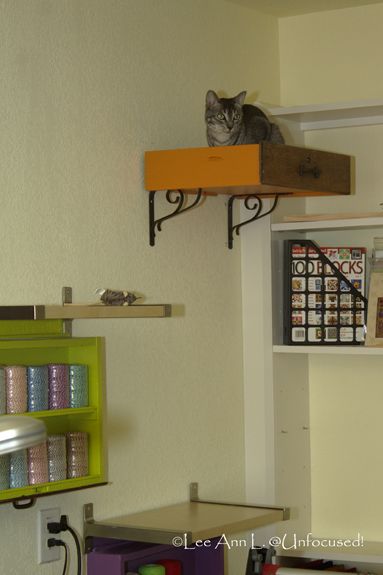
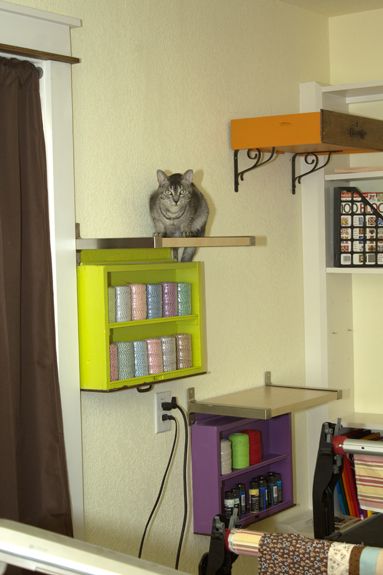
We finally hung them up around August 15th along with some shelves for Abby to get up high. I call the space above the built-in "Abby Land" because she can go up there and explore if she wants.

The top one is doubles up as a cat bed.

I am thinking I need to add some non-slip surface material to the shelves; but, I am not sure yet.

Wednesday, April 1, 2015

Wordy Wednesday {A Peek into the Studio}

It has been awhile since I posted anything on the progress in my room. I just have not felt like posting about it of late. We are basically finished and have only a few minor project left. I am still organizing and moving in stuff. I could start crafting and sewing now; but, I fear that if I start doing that before finishing the moving and/or organization, I will never get done.

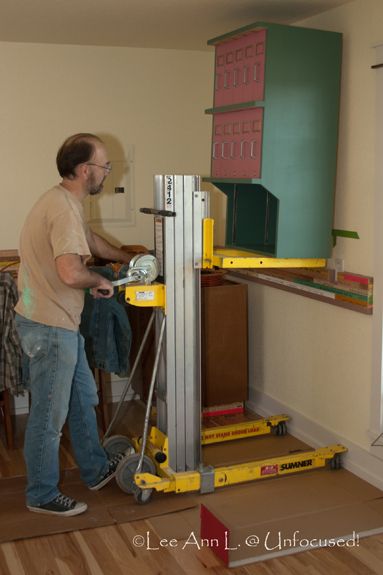
This picture was taken way back in January. In fact, it was on Dan's birthday. These are my beading and storage cabinets that we found at a Moving (Garage) Sale and they were finally hung up. We had a hard time finding the right tool to rent to put these up on the wall; but, we finally found a place that rents them in Converse, Texas. I am pleased with how the cabinets turned out.

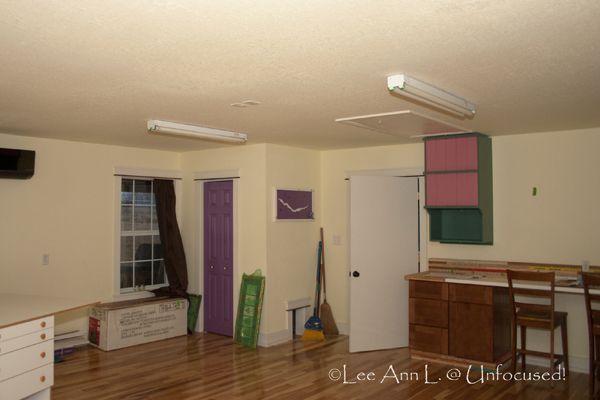
This is a "before" image of the lighting situation. Also taken in January.

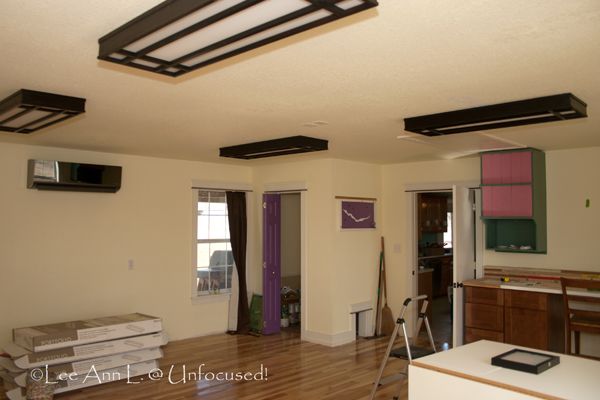
The "after" image! I love how these look in the studio. We added two more lights to the original two. And oh, we also added a light in the "closet".

By the way, only one closet in the entire house has a light and that is in our master bedroom closet. It annoys me. I decided that this closet should have at least a cheap light to see in the dark! I am so glad I made that decision. I am wanting to add lights to the hall closets (at the very least); but, I do not know how to go about doing this yet.

We cleared out the guest room to get it ready for work to be done in there April 1st (today). We are hoping the room will be ready for guest(s) to sleep in soon. It will not be finished; but, at least, people will have beds to sleep upon.

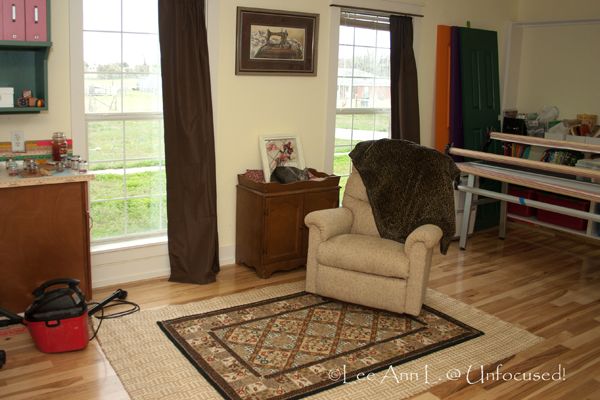
Anyway, we found some rugs buried in the guest room that came from our Houston house over seven years ago. I had forgotten that we had them. I immediately thought they would be the perfect size in my studio for a spot I had in mind. Sure 'nuff, they are almost perfect! Even the coloring seems right for the space. So, I do not have to get anything for this little spot in the studio. I love repurposing things. It is also nice to have something besides the major furniture from our Houston house in this current home of ours.

I purchased the chair a little while later at an extreme discount due to the fact it was discontinued, a floor model and the last one they had. I did not know this until I chose the chair after trying out a kajillion of them. It was very comfortable, smaller in size and felt perfect for (to) me. I thought it would be perfect for the little sitting area. It does seem to fit perfectly in the space.

Dan was the first to use the chair. He used the chair Monday watching TV (which is set above my desk) while I puttered about making some more drawer dividers (organizers) out of yardsticks.

There is only one problem with the little sitting area. When I finally got the area situated (set up) and sat down in the chair to test the space out, I immediately thought of Mother. Do I really need something that 'channels' my mother?!? For some odd reason, this little spot reminded me of her. It made me feel so sad and at that same time, I am glad I have the nice little "visiting" area in my studio.

Monday, September 16, 2013

A Moving Sale Find for [Future] Sewing Room

My facebook status on 9/15/2013:

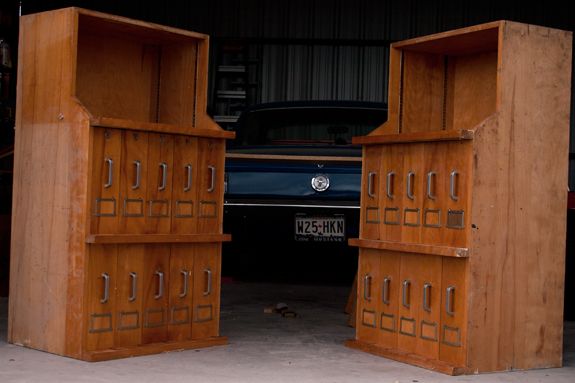
There was a moving sale yesterday and today two houses down the street from us. We went to check it out yesterday morning and I fell in love with some weird cabinetry that I could visualize using for crafting and beading. It needed some work. They wanted too much money for it and I would not budge from my price. So, we walked away. We went back today after 2pm and they still hadn't sold the cabinetry. I had Dan handle the "haggling" this time and we got it for what I wanted yesterday. I'm totally thrilled!"

These are actually upside down. We will be hanging them directly on a wall. There is already some metal shelving racks inside the open area of the cabinet. We will be purchasing some brads and making some shelves to go into those areas (top of the items in picture).

Both pieces need some work. We will have to replace a board or two due to water damage. I plan to paint the exterior of the cabinetry a white color. I am hoping the fronts of the drawers are still in good condition to keep in its "natural" state.

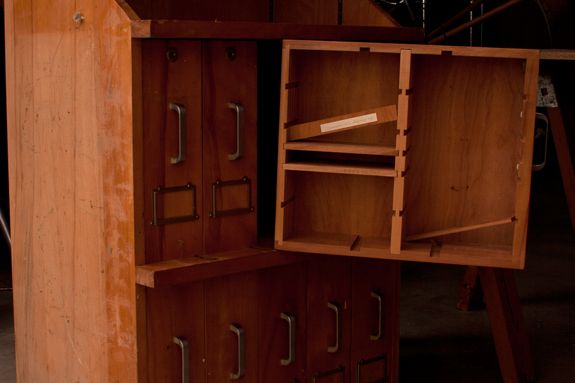
When you pull out a "drawer", it comes fully out and the back of drawer can be against the front of the cabinetry. Can you not see (in your mind) pretty bottles full of beads, buttons and/or crafting supplies stored in these "drawers"?

We were told that these are old and once resided in a hospital. The labels inside of some drawers indicates this to be truth; however, I cannot confirm if this is truth and honestly, I do not care because they will serve a good purpose for me.

Tuesday, August 23, 2011

DIY Tuesday: Trash to Treasure (Finale)


Trash to Treasure: Before Pictures
Trash to Treasure: Part II
Trash to Treasure: Part III


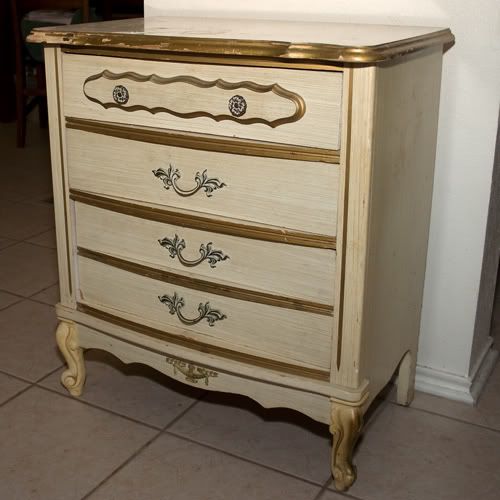
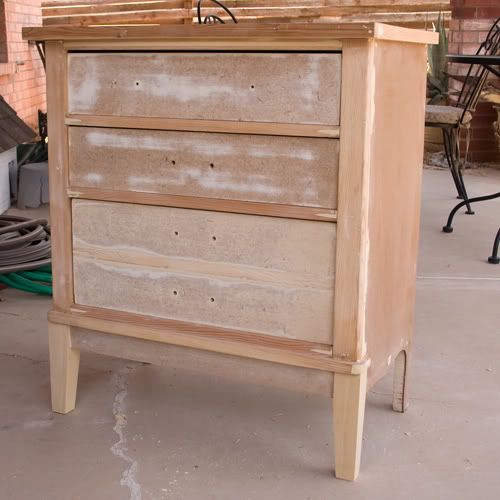
Just in case you need a reminder of what this nightstand looked like before the change

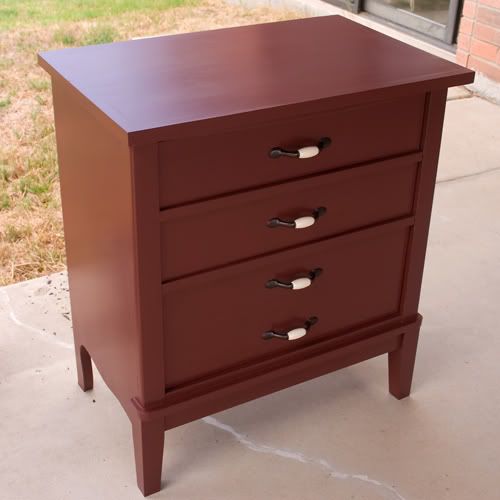
The Final Product!

I am planning to get a glass top to protect the surface. This nightstand is now in the room by the bed and it is mine. I am so happy. After 14 years of dealing with a cheap round table with a tablecloth, this takes the cake!

I absolutely love how this nightstand turned out and the color goes extremely well with the existing furniture in the bedroom. I am tickled pink with this project. And, Dan is extremely pleased with it too.

The total cost of this project (not counting the glass I am planning to get for the top) was less than $50. We purchased the handles, the most expensive part of the entire project. We also purchase wood for the new feet and sides, paint and a couple of paintbrushes and sandpaper. We already had the rest of the supplies.

Not bad for a rescued piece of trash.

By the way, work on the DIY desk has been restarted last Sunday. It will be Dan's and I think he is looking forward to having something substantial for a nightstand besides a cheap rickety old round table.


I am linking up at:
  Creations by Kara      Todays Creative Blog  The Shabby Nest

Tuesday, August 16, 2011

DIY Tuesday: Trash to Treasure (Part III)


Trash to Treasure: Before Pictures
Trash to Treasure: Part II

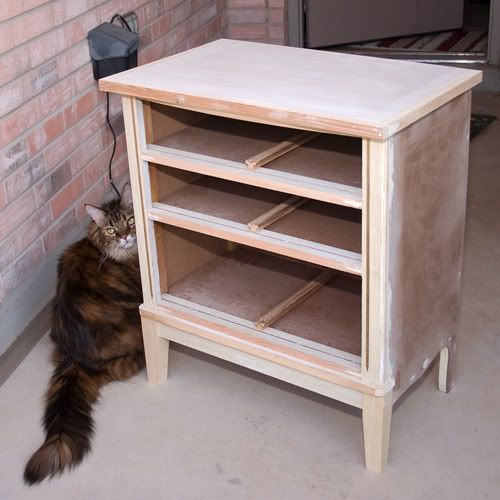
This project is 95% completed. It just needs a couple more coats of Polycrylic on it and then the handles put on. One last thing I will do in the future is get a protective glass cut for the top of the dresser aka nightstand.


Dresser with the sides and back put on
All ready for priming and painting


Chessie had to come out and check on the dresser

Drawers Primed

Dresser Primed

The dresser has been painted. We still need to put at least one more coat of Polycrylic all over and another two coats on top of the dresser to give it additional protection as I don’t know how long it will be before I get the special glass for the top.
Dear Sister-in-law,

I am so sorry this isn’t finished yet. We honestly had all the intention in the world to get this finished over this past weekend; but, other things interfered with our plans. I know the suspense is killing you. Soon, sister, soon it will be done. Hang in there.

With all my love,

Lee Ann

PS: Ha!


Tuesday, June 7, 2011

DIY Tuesday: Trash to Treasure (Part II)


Trash to Treasure: Before Pictures

I had originally posted pictures of a nightstand knowing my sister-in-law would give me grief for not posting more on the progress we did on the furniture. Sure enough, that afternoon (after I posted), I received a message from her giving me grief because I had not showed more! It made me laugh! I sure love to tease people. She knew that we had done some work on the nightstand and wanted to see pictures.

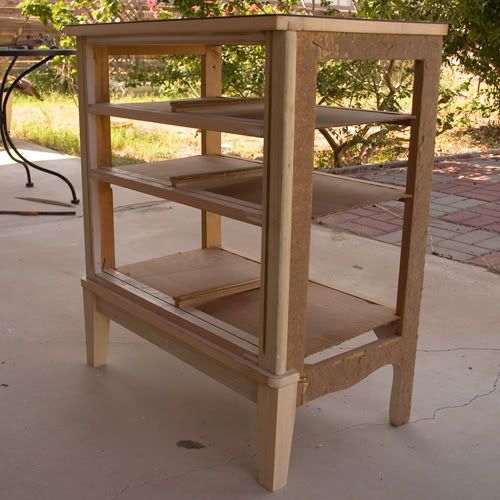
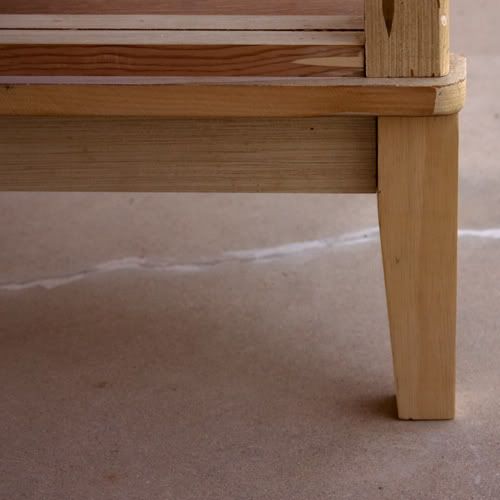
We are about halfway through the work on this particular piece of furniture. I am real pleased on the progress. The making of the new legs slowed us down because he had to figure out how to make them. Things should progress faster now that the new legs are on the furniture.

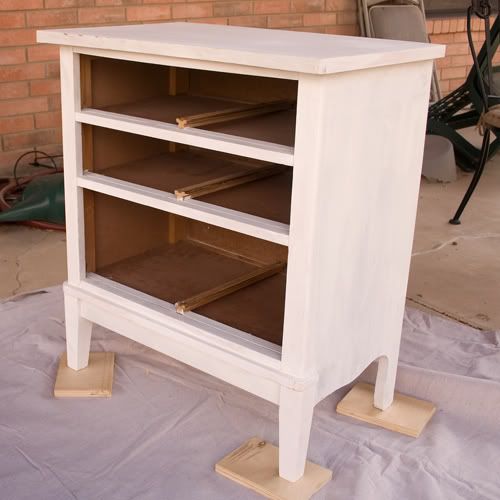
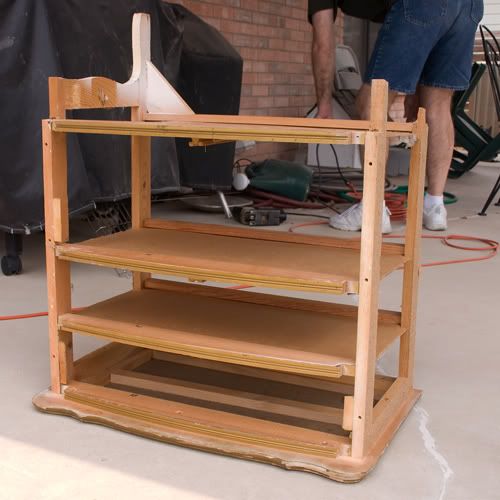
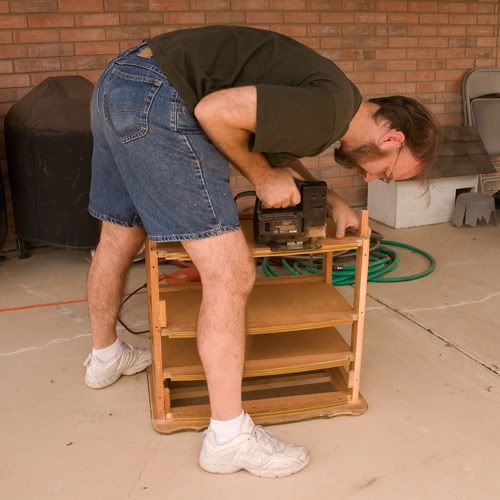
Here are a few pictures I took of the work in progress:

April 30th, 2011 (the day we rescued the nightstand):


Stripped Down to the Bare Bones

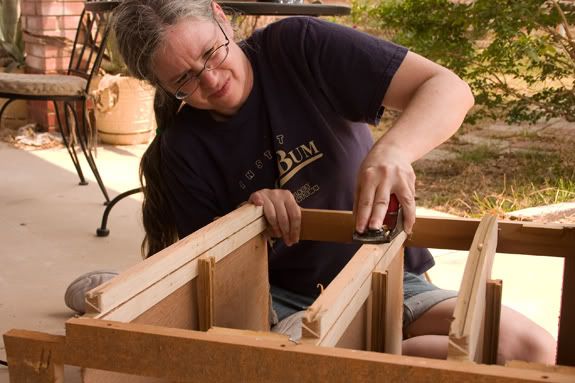
First Tried Using Jigsaw to Straighten the Ugly Curves

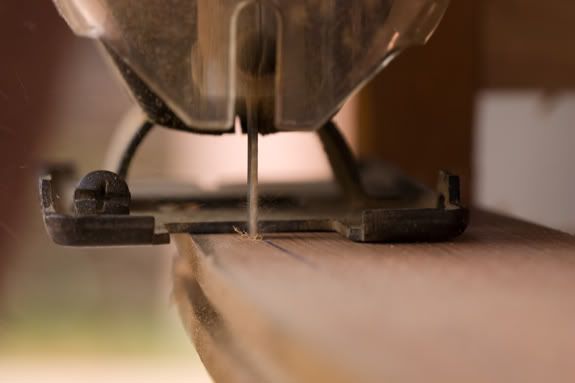
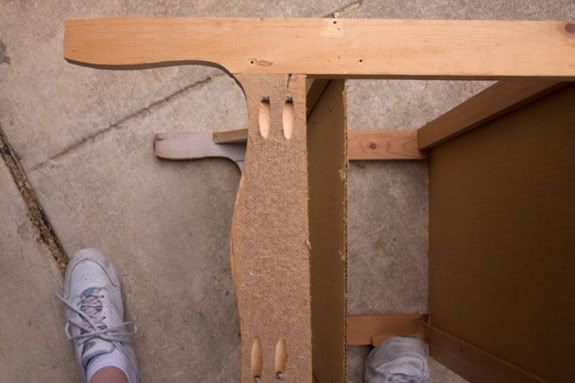
No Reason for this Picture – Just Thought it was a Cool Shot

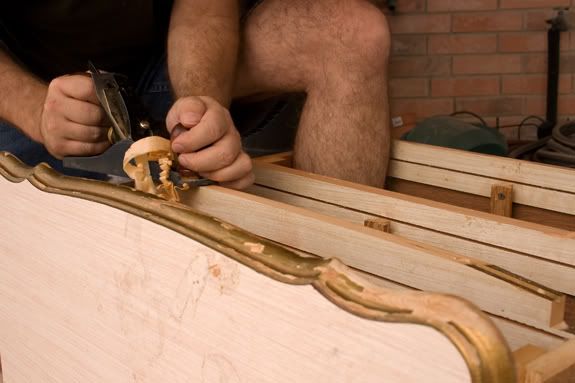
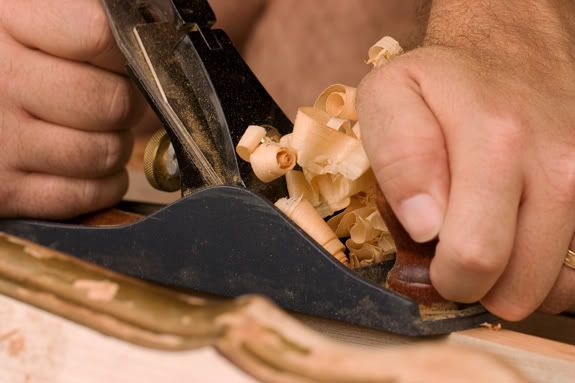
Attempting to Smooth the Edges with a Plane

Dan Took Over – it was Easier to Use a Plane Rather than a Jigsaw

Another Meaningless Picture – Thought it was a Cool Shot

We also squared the top of the nightstand. I have no pictures of this process. I have no clue to why. Maybe I got tired of taking pictures. ha! Anyway, it was done with a plane too.

On Approximately May 7, 2011:


A New Back Leg/Foot and I’m Not Talking About the Legs Attached To the Human Feet. Ha!

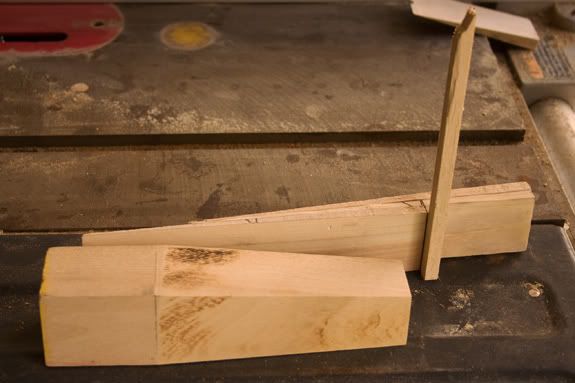
It took Dan some time to come up with a jig that would work for creating the new front feet using the table saw. Both of us really did not want to spend more money than necessary. And, life took priority over this project (and all others).

June 4th, 2011:


Dan’s Rigged Jig (in the background) Helped Create the New Simple Foot

We then had to get a few supplies such as bolts to screw the new feet onto the nightstand. Fortunately for us, we found some at Walmart. So, we did not have to make a run to Home Depot or Lowe’s.

June 5th, 2011

New Gorgeous Feet

Close-up Shot

Side Perspective

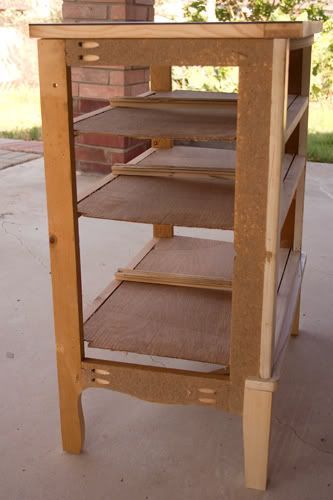
This is the current state of the “Trash to Treasure” project. The next step is to create and attach the new sides to the nightstand along with the old backing. Once that is done, we then will prime and paint the nightstand and its drawers and put on the new handles. It is so close to be done!

Tuesday, May 17, 2011

DIY Tuesday: Trash to Treasure


On Saturday, April 30th, I went for my usual walk and I spied a nightstand out on a curb waiting for the trash man to come and pick it up. I took a look at it and started thinking…

A little while later, I made the decision that I would like to try to salvage the nightstand and totally change the look. I asked Dan to take a drive with me to check it out. He gave the “go ahead”. We took off with it feeling rather weird for dumpster diving. But hey, if this works, I will get a cheap nightstand out of the process.

When we got it home, we made the decision to postpone the work on the desk because I felt that the work on this nightstand would go quicker. The work on the desk is slow going as we do not want to destroy it in the process. It really was put together by an amateur woodworker. Dan found sandpaper between two pieces of wood. He had hoped it was newspaper with dates. Ha!

Anyway, we have been working on this "trash to treasure" in our spare time. Actually, in Dan's spare time. I would say that it is about a third of the way done. So far, I am thrilled with the results. I have always had round tables with skirts. I must confess that I hate them. I have been looking forever for nightstands; but, I am too cheap to spend a lot of money to replace something that we already have that is functional. I am excited about getting a "new" nightstand soon!

Below is the trash (before) pictures of the nightstand.


UGLY!
Shocking News: The Medallions are Plastic! Ha!

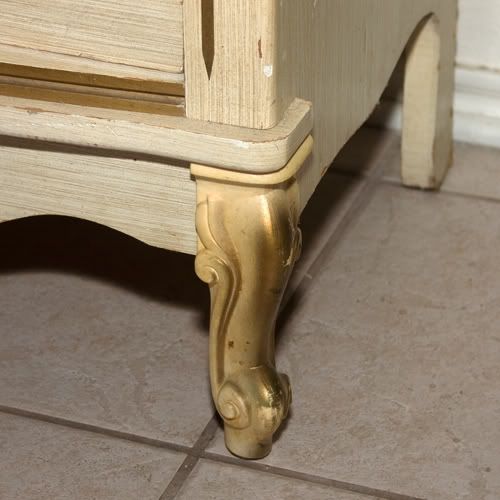
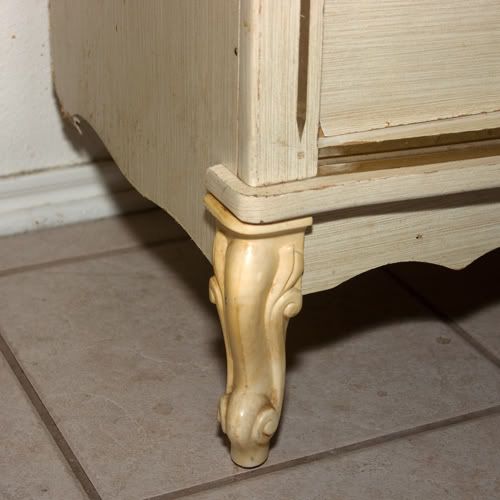
Details of Ugly Feet.
More Shocking News: The Feet are Plastic Too!

More Details of Ugly Feet Including a Broken Back Foot.

I have been taking pictures of the work on it periodically. I plan to post pictures of the process when it's almost done (before painting). I also plan to post pictures of the completed nightstand (after painting).

Tuesday, April 19, 2011

DIY Tuesday


[Note: I do not know what to call Tuesdays. Sometimes, it is fabric and/or sewing related and other times, it is crafting. And, for the first time today, it is DIY projects. If you have any suggestions as to what I can call Tuesdays, please let me know. Thanks!]

We stopped in Comfort (Texas) on the way home Sunday. We shopped in an antique store, had lunch in a nice little café, and shopped more antique stores. I enjoyed myself immensely. I think Dan did too looking at all the old tools and junk.


We Specialize in Stuff

This sign made me laugh!


And, this sign was in the storefront window. Too funny!

We wandered inside and looked around at all the ‘stuff’.
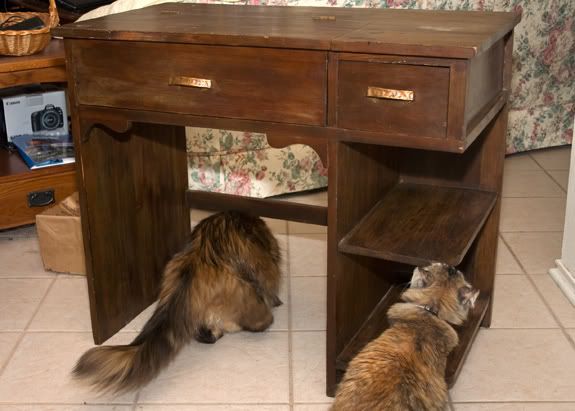

Closed Viewpoint

I discovered this beat up old desk. It appeared to be the right height for what I was looking for (to use as a nightstand). I loved the look of the whole piece of furniture. The opening where a chair would normally go would be a perfect spot for a cat bed.

It is just a beat up old rinky dinky desk with no value whatsoever. When I discovered the price of the item, I knew we had to have it because it was a bargain! No, a steal!

And yes, my cats had to check it out.
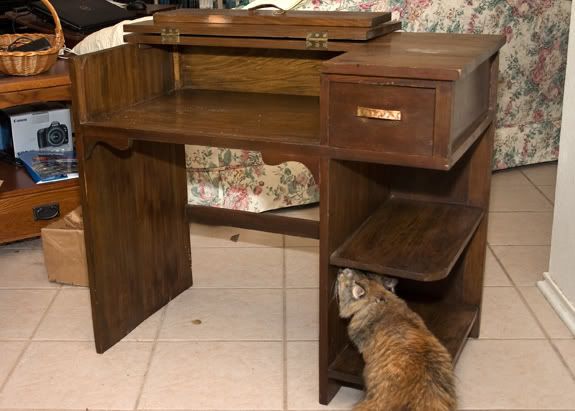
Open Viewpoint

It is the cutest little thing and looks like it was put together by a very good amateur woodworker. It is obviously very much used. I wonder what memories it contains within the wood. I will never know.
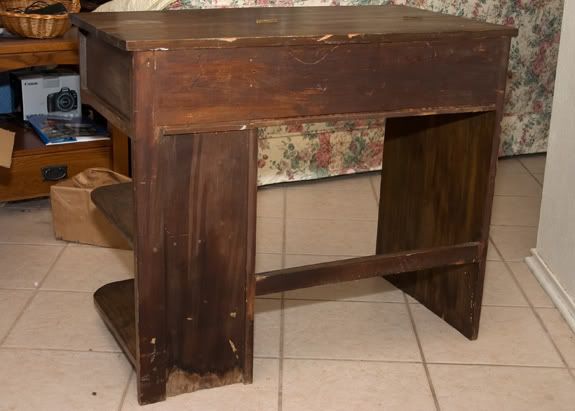

Back View

We are planning to literally take it apart, replace the backing, sand and stain it, and put it all back together again. If we discover that it is not stainable, then we will paint it a dark color. Not black. I dislike black.
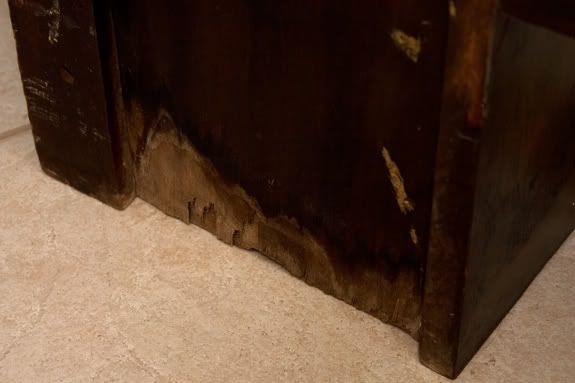

This is the reason why we are replacing the backing. It suffered major damage.

I am documenting what the desk looks like before we tear it apart this coming weekend. And, we may need pictures to refer back to just in case we cannot remember how it was put together. I hope not; but, it will not hurt to have these pictures.
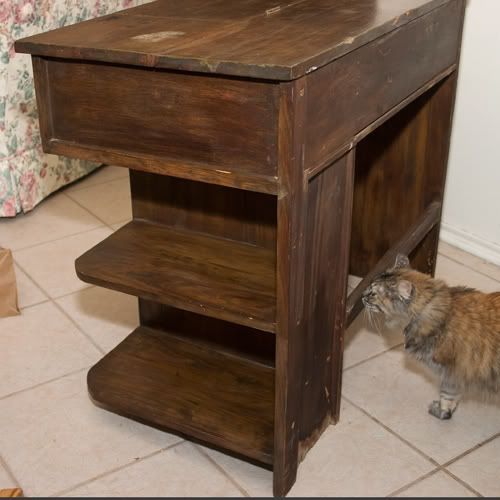

Side View
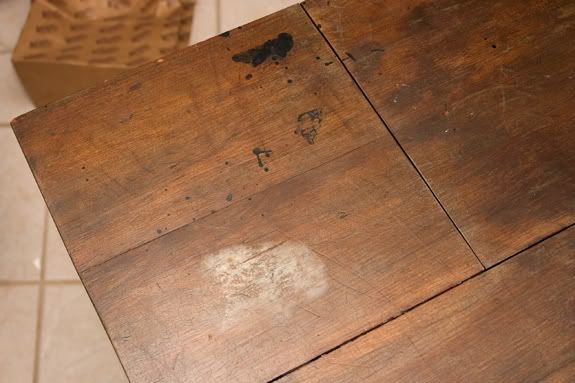
Top: Water and Ink(?) Damage
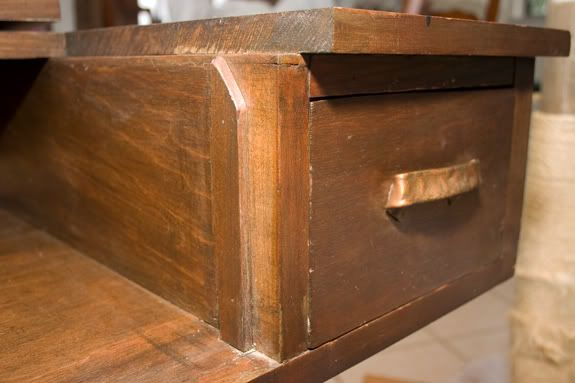
Closeup of Open Desk with Drawer

That reminds me, we will be replacing the drawer handles (or pulls) as I hate them.
I am excited because I finally found something that will work as a nightstand. I am also scared that we will destroy the thing in the process. If we do, we will not despair. After all, it was only $38.50.