
I blogged a DIY Teaser a little while back.
I was mean and posted another teaser last Wednesday.
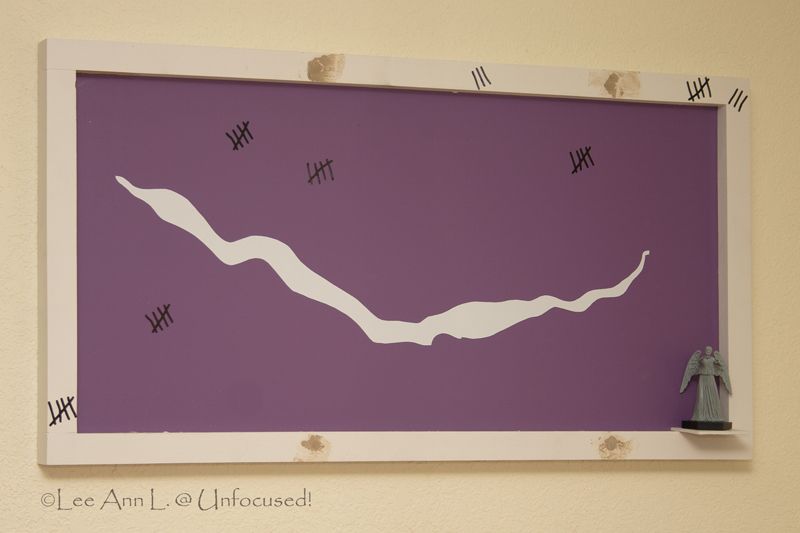
I am now going to show you the DIY project that just came from the depths of my mind. It turned out so much better than I expected. And, this project was made entirely from scraps leftover from other projects.

{This picture is awful; but, it was the best one out of all I took at this time.}
I had Dan cut a piece of leftover drywall (which was originally used to build the closet in my studio). I needed a smooth surface and the walls around here are textured.

We primed and painted the drywall. We then started to make a frame using leftover scraps from other projects.

We painted the frame. And, then we attached the frame to drywall. At this point, I applied the white vinyl.
We located the studs in the wall where I wanted this to be placed and determined where it should go. We marked and predrilled the frame. We felt it would be safest to hang it in the studs it was a tad heavy.

{To see a larger image, go here.}
The almost finished project as of September 28, 2014.
Regarding the weeping angel figurine (the original darker version is in a prior picture): I had taped off the base and spray painted the angel a light gray color. It is amazing what a difference it made - all the textures and details stood out more.
I added the tally marks. And, the holes in the frame were filled with wood putty. All it needs at this point is a little sanding and painting!
I will explain the details along with a picture of the final (finished) product soon. I am extremely pleased with the way it turned out.

No comments:
Post a Comment
Thank you so much for leaving me a comment. I always love hearing from you!